Fees Collection
How to add Collect Fees?
To add collect fees, go to Fees Collection > Collect Fees then select Class and Section and then click on the Search button. You can also search by keyword in the Search Text Box and click on the Save button. The list of the student will be shown below on the page.
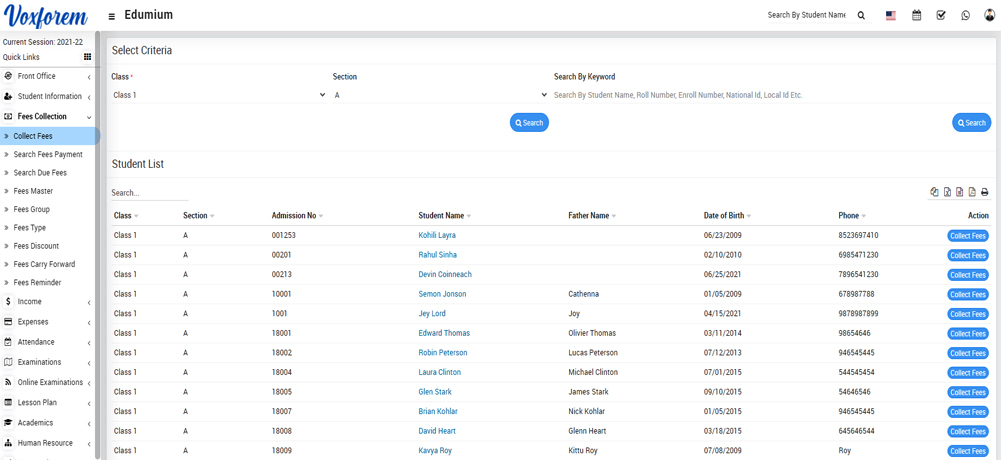
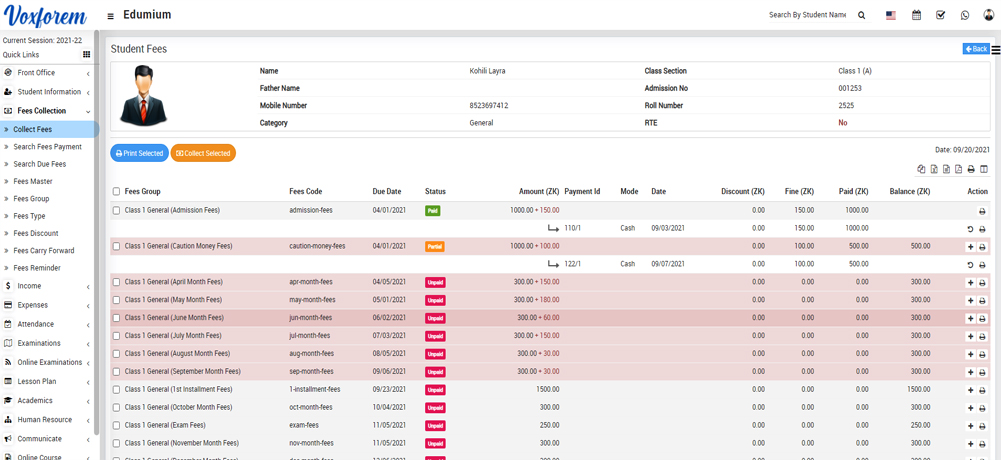
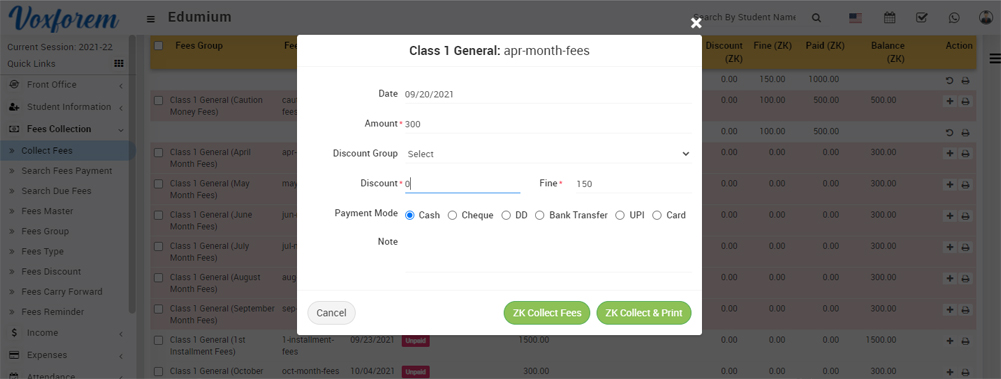
To view fees detail click on the Collect Fees button present in the Action column in the student list, at the click of this button Student Fees page will be open. Here you can see all assigned student fees details. To collect fees click on Add (+) icon present in the action column, at the click of this icon modal will be open.
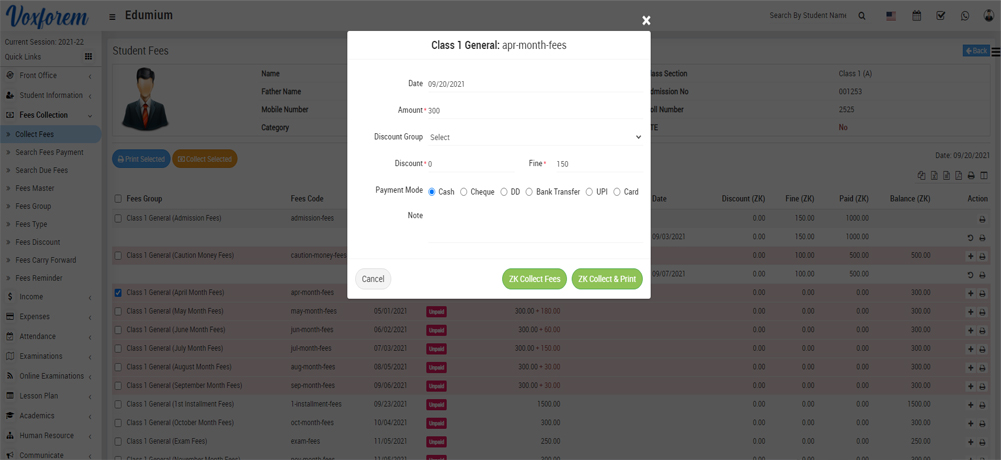
Fill all the details entries Date, Amount, Discount Group, Discount, Fine, Payment Mode (Cash, Cheque, DD, Bank Transfer, UPI, and Card) and Note (if you have any note) and then click on Collect Fees button. If you want to print fees receipt to click on Collect & Print button. Now fees has been collected and Revert button visible for reverting this fees. For printing Fees Receipt click on Print button from Action column.
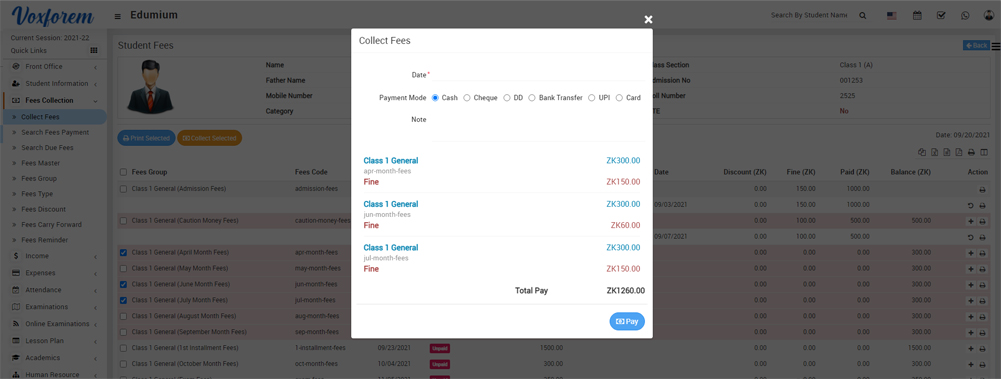
To collect multiple fees, at the same time select multiple fees from left check boxes then click on the Collect Selected button.
To fees discount adjustment, click on Apply Discount button from the Action column, at the click of this button Discount modal will be open. Here enter the Payment Id on which you want to apply the discount and enter Description and then click on Apply Discount button.
Categories
Related Articles
- About Fees Collection
- How to add Fees Group?
- How to add Fees Master?
- How to add Fees Discount?
- How to add Collect Fees?
- How to search Fees Payment?
- How to search Due Fees?
- How to Carry Forward Fees ?
- How to Fees Reminder?
- How to check Fees Statement report?
- How to check Balance Fees report?
- How to check Fees Collection Report?
- How to check Online Fees Collection Report?
- How to check Payroll Report?
- How student can view fees Details?